
The workspace layout
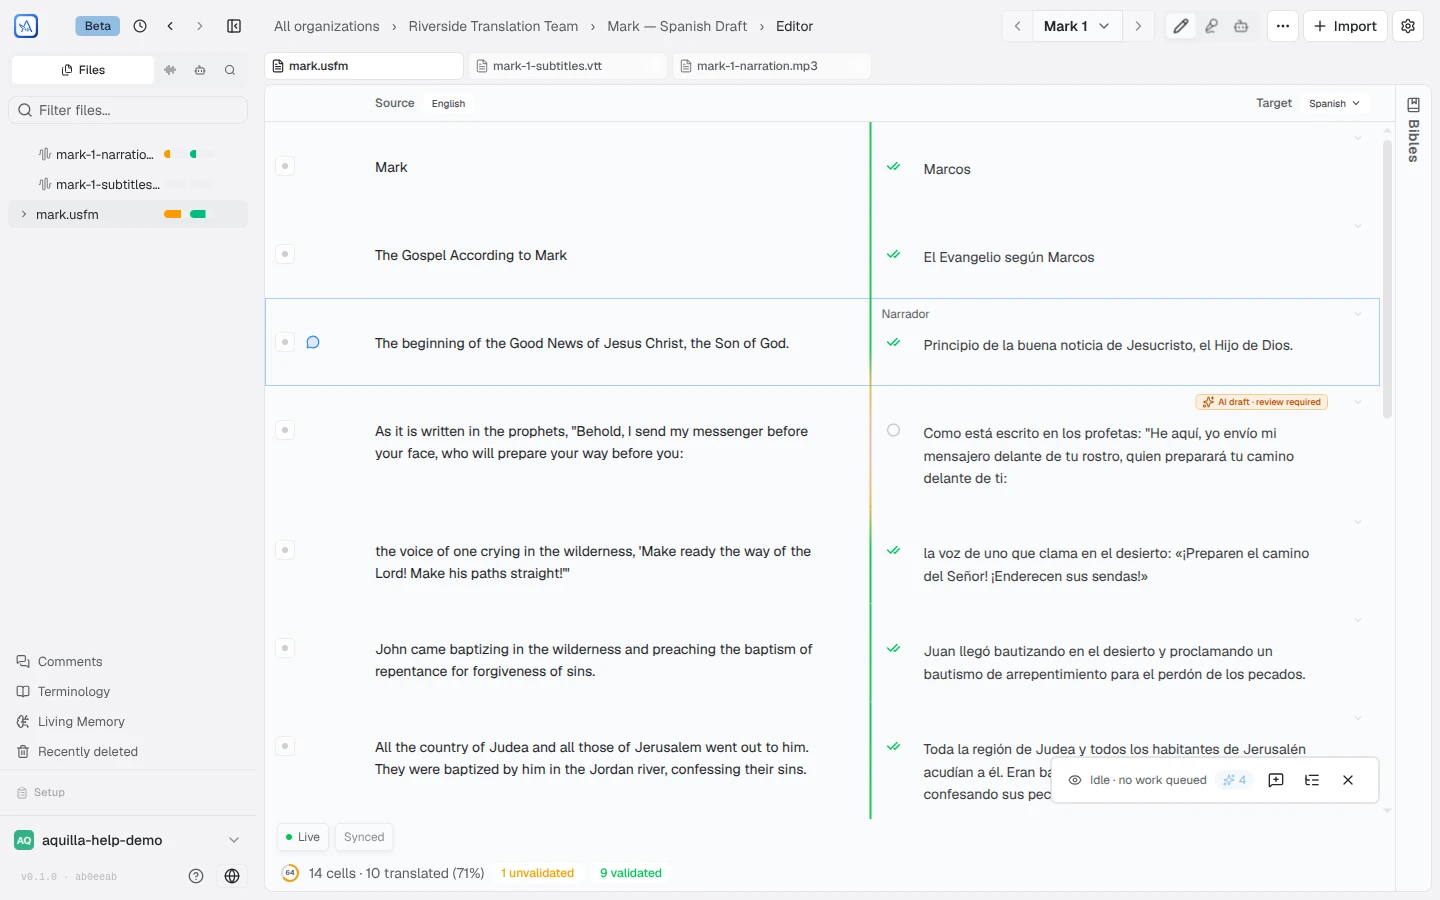
The translation workspace is built around a sidebar on the left and the editor filling the rest of the screen, with side panels that open on the right when you need them. Together they let you keep your bearings while you focus on the text.
The sidebar
Section titled “The sidebar”The left-hand sidebar is both your navigation and your map of the current project. Tabs at its top switch what it shows:
- Files: the project’s files, expanding to sections, each a clickable row with small translated and validated progress bars;
- Voices: the project’s cast of text-to-speech voices;
- Agent and Search: the project agent and project-wide search.
Below the tabs you can reach Comments and the More menu of project options. When you have work assigned in the project, a My assignments button with a count sits just above More; it opens your assignments in a popover, and clicking one takes you to it. You can also reopen the Setup checklist, and open the account menu (switching accounts if you have more than one).
On a narrow screen the sidebar moves into an overlay: a panel-left icon in the header opens it as a sheet over the editor, instead of sitting beside it, to give the editor more room.
The editor
Section titled “The editor”The editor is where translation happens. Depending on what you’re doing it shows either:
- the cell list: every cell in the current file, source beside target; or
- the single-cell editor: an expanded view of one cell with tabs for Health, Back-translation, Footnotes, Recording, Issues, and Metadata, each shown only when it applies to that cell. Edit history isn’t a tab; open it from History in the action rail’s More actions menu instead.
Each cell row pairs the source with your target editor, with a status area and an action rail (an AI button plus More actions) that appears on hover or focus. An icon toggle in the header switches between three views: Text (writing), Audio or Media (the voicing view; it reads “Media” on files ordered by timeline), and Agent, which opens the AI agent workbench instead of changing what the editor shows. Hover an icon for its label.
The target side carries a language tag that doubles as the lane switcher and an entry point to your target language (it reads Set target language if none is set yet). Maintainers and above get a dropdown, even on a one-lane project, with Change target language… and Add lane… (both open General settings at the Languages card); a member limited to certain languages gets the same dropdown over only their lanes, and other roles see a static pill. See the lane switcher for the full picture of working across multiple target languages.
On a phone, or a tablet in portrait, source and target stack instead of sitting side by side, with the target cell below its source and the language tags still reachable above them. The Agent view needs more room: narrower than roughly a tablet turned sideways, its icon drops out of the view toggle and the sidebar altogether, and Ask AI from a text selection doesn’t appear either. Rotate to landscape, or move to a larger screen, to reach it; see Using the AI agent.
Side panels
Section titled “Side panels”Some areas open as a panel beside the editor rather than taking you away from the text: Comments and a cell’s history, for example. They slide in on the right so you can keep the cells you’re working on in view, and close again when you’re done.
Living Memory works differently: it’s a standalone page, reached from the sidebar’s Living Memory row, not a section inside Project Settings. It has five parts: Brief, Instructions (the agent’s system prompt), Translation quality (Rules live here now), Knowledge base, and Examples.
The Search panel is one of these, and labeled toggles switch its mode: Search (find text across the project), Replace (find and substitute it), and, when the project has Bible resources set up, Bible (look up a reference without leaving the workspace). All three, plus the Parallel Bibles and Translation Notes flyouts, are covered in Search & reference panels.
A header and a status bar
Section titled “A header and a status bar”Above the editor, a header carries the current file and view controls; along the bottom, a status bar shows your sync state. Both stay put as you scroll. A breadcrumb in the header tracks where you are (organization, project, and file), so you can jump back a level without using the sidebar. A single ⋯ menu at the header’s end gathers the file’s bulk actions in one place: Import, Run AI completions, Draft all, Batch validate, Export, and more, instead of spreading them across the toolbar. The menu groups its items under the headings Editor tools, Run on this file, View & navigate, and This file.
You can move the sidebar’s tab strip between a left rail and a top bar; see Device preferences.
Help assistant
AI answers from the Aquilla docs — may make mistakes.