A tour of the workspace
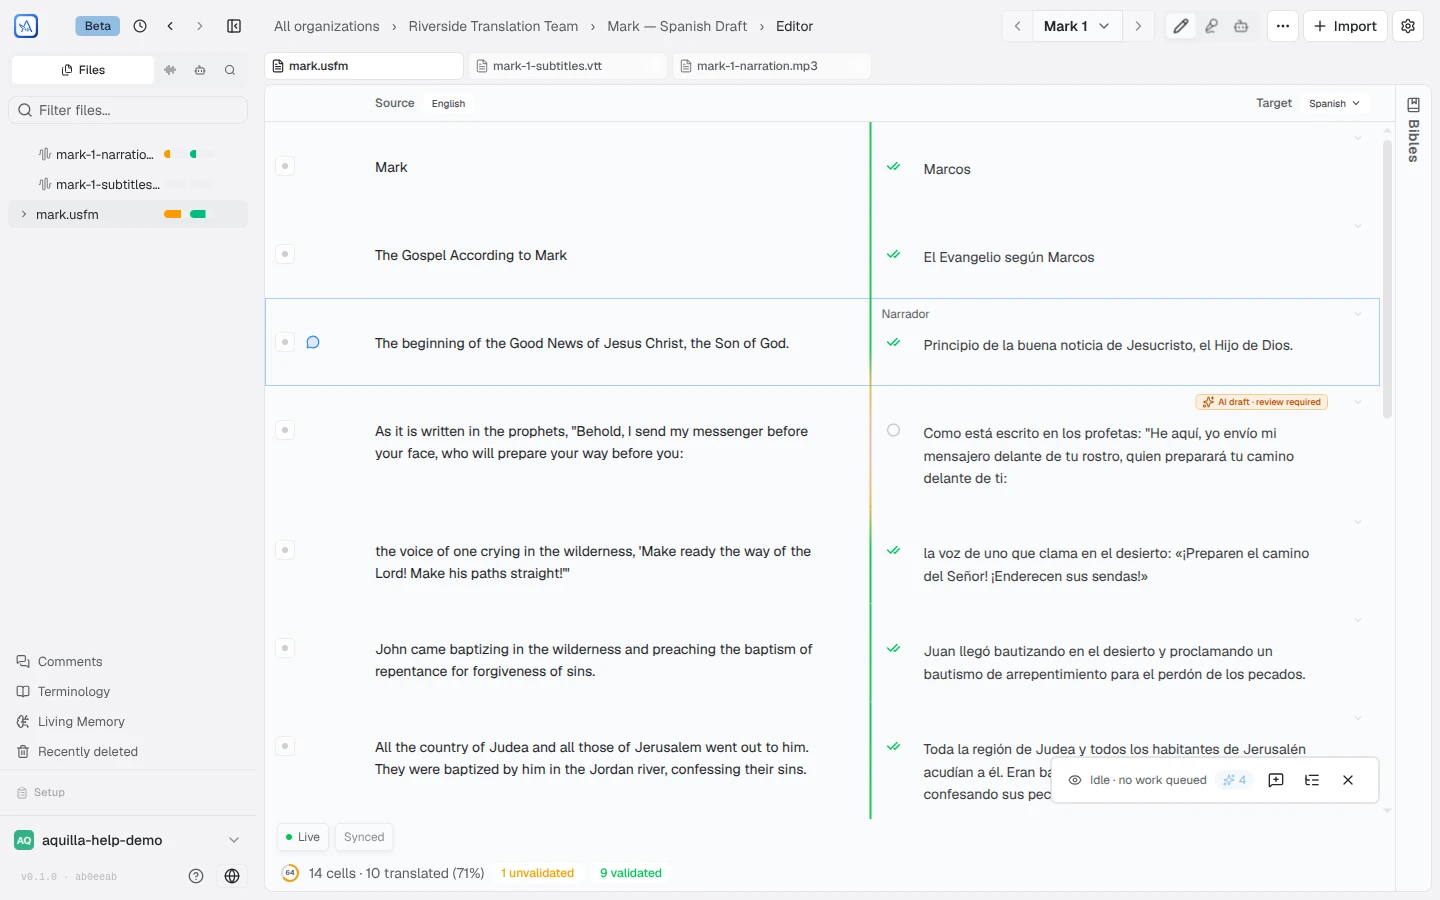
When you open a project, you land in the translation workspace: where all the actual translating, reviewing, and listening happens. It has three parts.
The three parts
Section titled “The three parts”- Sidebar (left). Both your navigation and your map of the project. Tabs at the top switch it between Files, Voices, Agent, and Search; below them you browse the project’s files and sections, reach Comments, My assignments (when you have work assigned) and More project options, reopen the Setup checklist, and open the account menu. On a narrow screen it hides, and a sidebar button beside the breadcrumbs opens it over the editor. You can also move the tab strip itself between a left rail and a top bar; see View settings.
- Editor (middle). The list of cells, or the detailed editor for a single cell. This is where you read the source and type your translation.
- Side panels (right). Comments, rules, and a cell’s history open as a panel beside the editor, so you can use them without leaving the text.
For the full breakdown, see The workspace layout.
What a cell looks like
Section titled “What a cell looks like”Most of your time is spent with cells: the paired source/target units that make up a file. Each cell row shows:
- the source text on the left,
- your target editor on the right,
- a small status area (validation state and a decay marker if the cell needs attention), and
- an action rail that appears when you hover or focus the cell: an AI draft button (plus a Draft-paragraph button on a paragraph’s first row), and a More actions button that opens the rest: record audio, upload an audio file, play a recording, generate and play a voice, add a footnote, add a comment, and edit history.

Click a cell (or its Open cell details arrow) to expand a detail panel with tabs for Health, Back-translation, Footnotes, Recording, Issues, and Metadata, each shown only when it applies to that cell. Edit history opens from History in the action rail’s More actions menu.
Finding your place
Section titled “Finding your place”- Expand a file in the sidebar to see its sections, and click one to jump straight there (for scripture, a section is a chapter).
- Project leads can drag a file by its grip to put it in a different place in its group, or onto another group to move it there. Everyone on the project sees the new order.
- When you reopen a project, Aquilla returns you to where you left off: the same file and section.
See Files, cells & navigation for more.
Switching the app’s own language
Section titled “Switching the app’s own language”A globe icon in the sidebar footer switches the language Aquilla’s own interface (menus, buttons, messages) is shown in: currently English, Thai (ไทย), Burmese (မြန်မာ), Malay (Bahasa Melayu), Indonesian (Bahasa Indonesia), Arabic (العربية, which also switches the interface to run right-to-left), Simplified Chinese (简体中文), Traditional Chinese (繁體中文), Russian (Русский), French (Français), Spanish (Español), and Portuguese (Português). The Spanish and Portuguese interfaces are early drafts that no native speaker has reviewed yet. The same choice lives in Preferences → UI language. It’s remembered per device, in your browser, the same way as your view settings.
A few things to know
Section titled “A few things to know”- Nothing to save. Your edits are saved automatically as you move between cells. See Editing cells.
- You’ll see teammates. If someone else is editing a cell, you’ll see it marked in real time. See Real-time sync & presence.
- Tune the view. Toggle line numbers, cell labels, and source/target text direction in View settings.
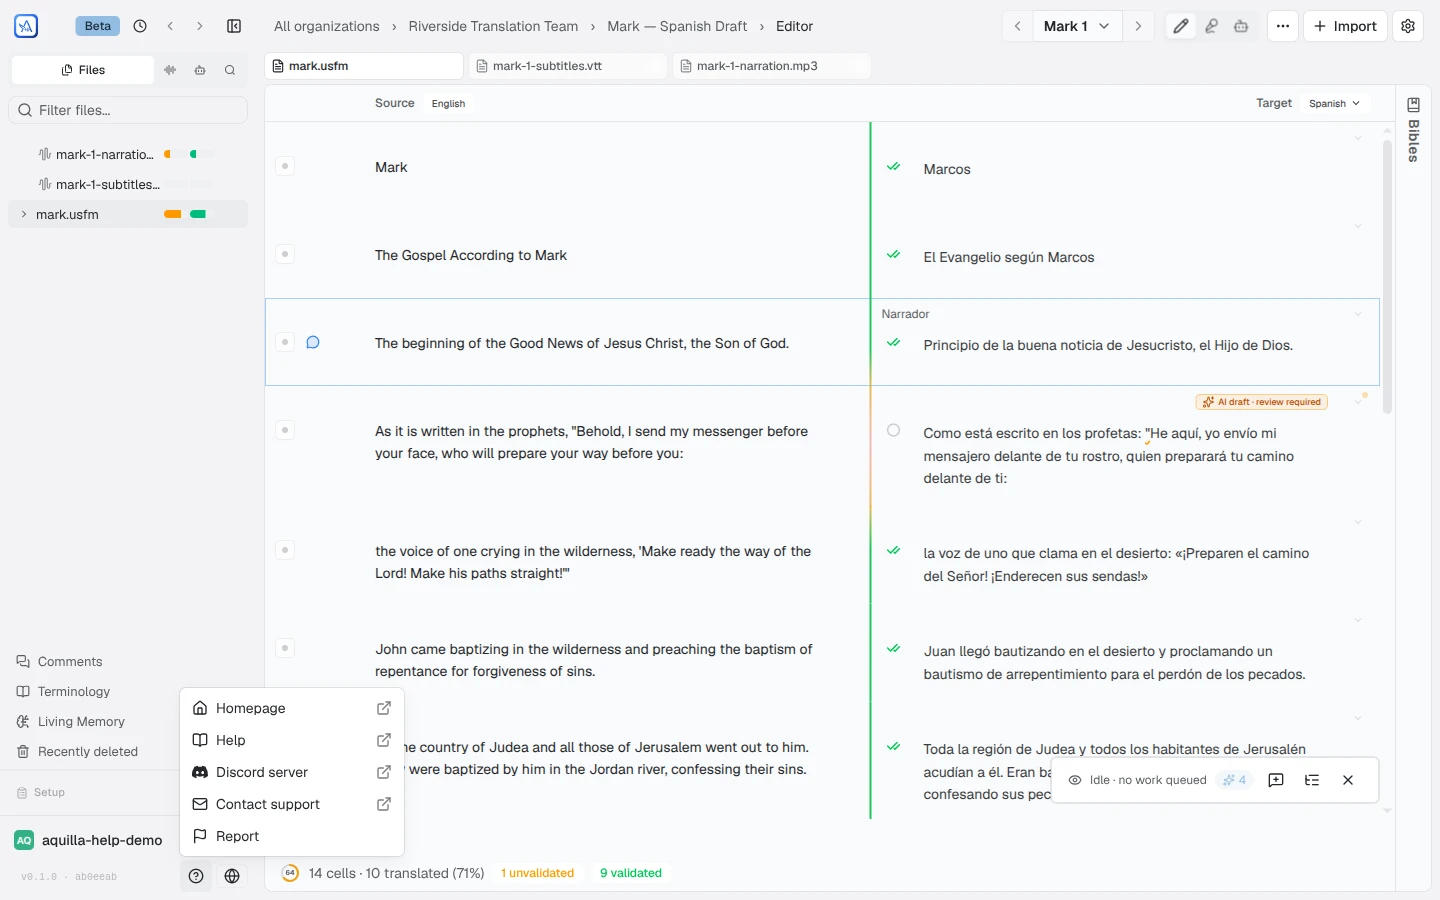
- Help is a click away. The Help & community button (the ? icon) at the sidebar’s foot opens a menu with Homepage, Help (this site), Discord server, Contact support, and Feedback, which sends a problem report with your session context attached.
Help assistant
AI answers from the Aquilla docs — may make mistakes.